Sunday, September 27, 2015

Baby Quilt Tutorial


I love to make quilts, especially BABY quilts! So when I was expecting I went on the hunt to find the perfect one. I found this super cute quilt tutorial here


Picking out the fabric for this quilt was so hard for me! I knew I wanted some bluish, minty colors along with some coral and neutrals. I searched multiple stores and almost gave up on the last one but by some miracle started making connections with fabrics at the last minute!  

I have to give a lot of credit to my amazing grandma on this quilt, she pushed me to get it done just a week and half before baby H was born! She also did a lot of the hard work with cutting, pressing, etc. She let me just sit in a chair with my big belly and sew my heart out. 


Once all the blocks were made I lined everything up how I wanted it before sewing it into rows. I also ended up making a little smaller quilt than in the tutorial but I think it turned out to be the perfect size!

Once the top was ready I went ahead and freehanded the quilting-only took about an hour, it was fabulous! All that is left is the binding and it's done.

So happy with how cute it turned out! 

Thursday, September 24, 2015

DIY Refinished Dresser


When looking for the dresser for the nursery I wanted something that looked a little more old fashioned. I told my awesome aunt who is the best bargain shopper I've ever met and she quickly snatched this up! This dresser was a steal and it even had a huge mirror that went above it! We had to fix a few drawers but that was easy. 

This is originally how it looked and we decided we wanted to paint it to give it a cleaner look. So we went to work with sanding... and sanding.. and a little bit more sanding... We then had to strip the rest of the paint off of it. 

BEFORE

Once the paint was stripped we were ready to go for the painting. The hubby was a champ! This was not an easy project to paint. 


The handles on the dresser were originally gold colored, but were super dirty, so I found a tutorial online of how to clean them... and it didn't work. So we went to the next best thing and spray painted all of the handles gold. They looked perfect!

AFTER
And...this is how it looked after it was all put together! TADA!

Wednesday, September 23, 2015

DIY Flower Nursery Mobile


When I was first designing the nursery, I looked around for all sorts of ideas. When shopping for a mobile to go over the crib everything I saw was SO expensive. With me needing to quit my job due to pregnancy complications, we were putting together this nursery on a budget! I was inspired by a picture of a mobile I saw on an Etsy shop (the mobile was over $100!!). So I decided I needed to do it myself, which I did, for $5. That's right, $5! 

I headed to the craft store, bought 5 blocks of felt, each costing 20 cents. I bought a little container of pearls and that was all I needed. I had leftover wreath material from a different project and I used fishing line I already had to string the mobile. 

I found a template for the felt flowers on Pinterest here.

Cut out the felt in the shape of the template. Once cut, start by rolling the felt from the outside in and occasionally put a dot of hot glue in there while rolling. When you get to the middle, hot glue the middle piece to the bottom of the flower. (The cutting can take a long time.. I recommend turning on netflix and going at it!) 

Once I had my flowers made I cut fishing line to the length I wanted it (you can decide that too). Then I taped the line to a hard surface so it was easier to control. I then used a needle to thread the fishing line through the center of the flowers and pearls. I would recommend tying a knot or putting a dot of glue near the center of the flower when on the proper place in the line so it doesn't slide down. 

You can design your mobile strings however you want. I didn't make my strings all the same length. Some have 4 flowers on them, some 3, some 2. Some started at the top with a pearl, some started at the top with a flower. It was fun to make it random. 

Once all my flowers and pearls were threaded I tied the strands to the wreath. Then I hung it from the ceiling using more fishing line... and TADA!

Photo Cred: kelseyhadleyphotography

Wednesday, July 16, 2014

YW Glow in the Dark Volleyball

In April the YW were in charge of the combined YM/YW mutual activity. We had the YW vote and the choice was glow in the dark volleyball! This was a very fun activity and pulled some of our YW out of their comfort zones, which definitely isn't a bad thing.

All you need for this activity is the church gym, volleyball net, volleyball, glow sticks, glow in the dark tape and UV lights. We bought a bunch of glow sticks and glow in the dark tape from the store and were able to borrow 3, 3-foot UV lights from members of the ward. Before the activity ask the youth to wear white, this really helps them glow in the UV light.


To set up, we put up the volleyball net and linked glow sticks along the top and bottom of the net so it was easier to see in the dark. We handed out glow sticks for all the youth to wear. We wrapped the volleyball in some glow in the dark tape to make it easier to see, plugged in the UV lights, and turned out the lights. We split up the youth into teams and began to play! We ended our activity with some rootbeer floats... mmmm.


Some things I would change would be to get as many UV lights and you possibly can. Only having 3 UV lights in the gym made it a little hard to see but it didn't stop us from playing! Also, you may want to set up some string or tape that will glow around the court so you can see when the ball goes out.

Even with changes I would make, this activity was super fun and everyone seemed to like it, even the shy ones who typically don't want to participate in activities like this. I would do this activity again in a heartbeat... and maybe add a spiritual lesson to it as well! Enjoy!

Tuesday, April 1, 2014

10 Simple Ways to Show Your Spouse You Love Them

I have been married to the most amazing man for 2 1/2 years, and over these 2 1/2 years Nate and I have worked to find ways to show each other that we love each other. For the last year, our lives have been pretty busy. I commute 40 minutes South to work, Nate commutes 40 minutes North to school. It makes for some pretty long days. So how do we find time to show each other that we love each other? It isn't in big fancy dates, surprise trips, or expensive gifts. It is simply in the little things. Yes, the LITTLE THINGS! Here is a list of little things I came up with that Nate and I have done/do for each other:

1) Before leaving the house, make sure to give your spouse a kiss and say "I love you."

2) Never end a phone call without saying "I love you." 

3) Make them a lunch to take to work and/or school. This is especially wonderful on those days when either of us are running late. And... if you make them a lunch you can leave little notes for them to surprise them when they open up their lunch. For example, one day I opened my lunch to this... told you the hubby was pretty awesome.


4) If they are having a rough day, do something nice for them. However, they don't have to be having a bad day in order to do something nice :). If Nate is having a rough day I like to run by the store on my way home and get him one of his favorite treats. On one particularly bad day of mine, Nate surprised me and I came home to this:


5) Leave them kind notes in places they will find them. Stick a note in their backpack where you know they will find it. My husband is an engineering major... so I would stick a note on his calculator :). If you leave for work before them, stick a note on their windshield or steering wheel.

6) If it snowed the night before, scrape off their car for them. Nate and I have both done this for each other and it is one of the best feelings when you get out to the car and find that you don't have to spend 5-10 minutes standing in the cold trying to get all that snow and ice off!

7) Make dinner! I usually get home first so I typically get dinner going, however, if you don't typically make dinner, it's always a nice surprise for your spouse who does! When Nate and I were both in school we made an effort to make dinner together and it was always fun. Making dinner was the time we could hang out before homework took over for the rest of the night. So whether you decide to help out with dinner or surprise them with dinner, your spouse will sure feel loved!

8) Send them a text letting them know you're thinking about them. I love the days when I get to lunch and have a sweet text from the hubby waiting for me. It doesn't have to be anything special, it can just be asking them how their day is going.

9) Listen. Make an effort to truly listen to your spouse. Even if it isn't something you are really interested in, pay attention and listen. Nate likes to talk to me about engineering... and usually everything he tells me goes way over my head but I do my best to listen anyway :). Today we have so many distractions: phones, ipads, computers, T.V., instagram, twitter, facebook, pinterest, etc. These are all wonderful things, but put them down when your spouse is trying to talk to you.

10) Pray for your spouse. Pray for them to be successful, pray for them to be happy, pray to know of ways that you can show your spouse you love them, and be thankful for the spouse you have.


Saturday, March 29, 2014

YW Book of Mormon Cake Boss

In February I was put in charge of the YM/YW combined activity. I wanted to do something that everyone would enjoy and link it back to the gospel. As I was brainstorming for an activity I came across a blog here. Book of Mormon Cake Boss! It was super easy to plan and prepare.

First, I chose a couple stories from the Book of Mormon that the youth had to depict through decorating a cake. I picked 4 stories (you can do however many stories and whatever stories you would like). On a piece of paper, I wrote down the title of the story and where to find it in the scriptures.

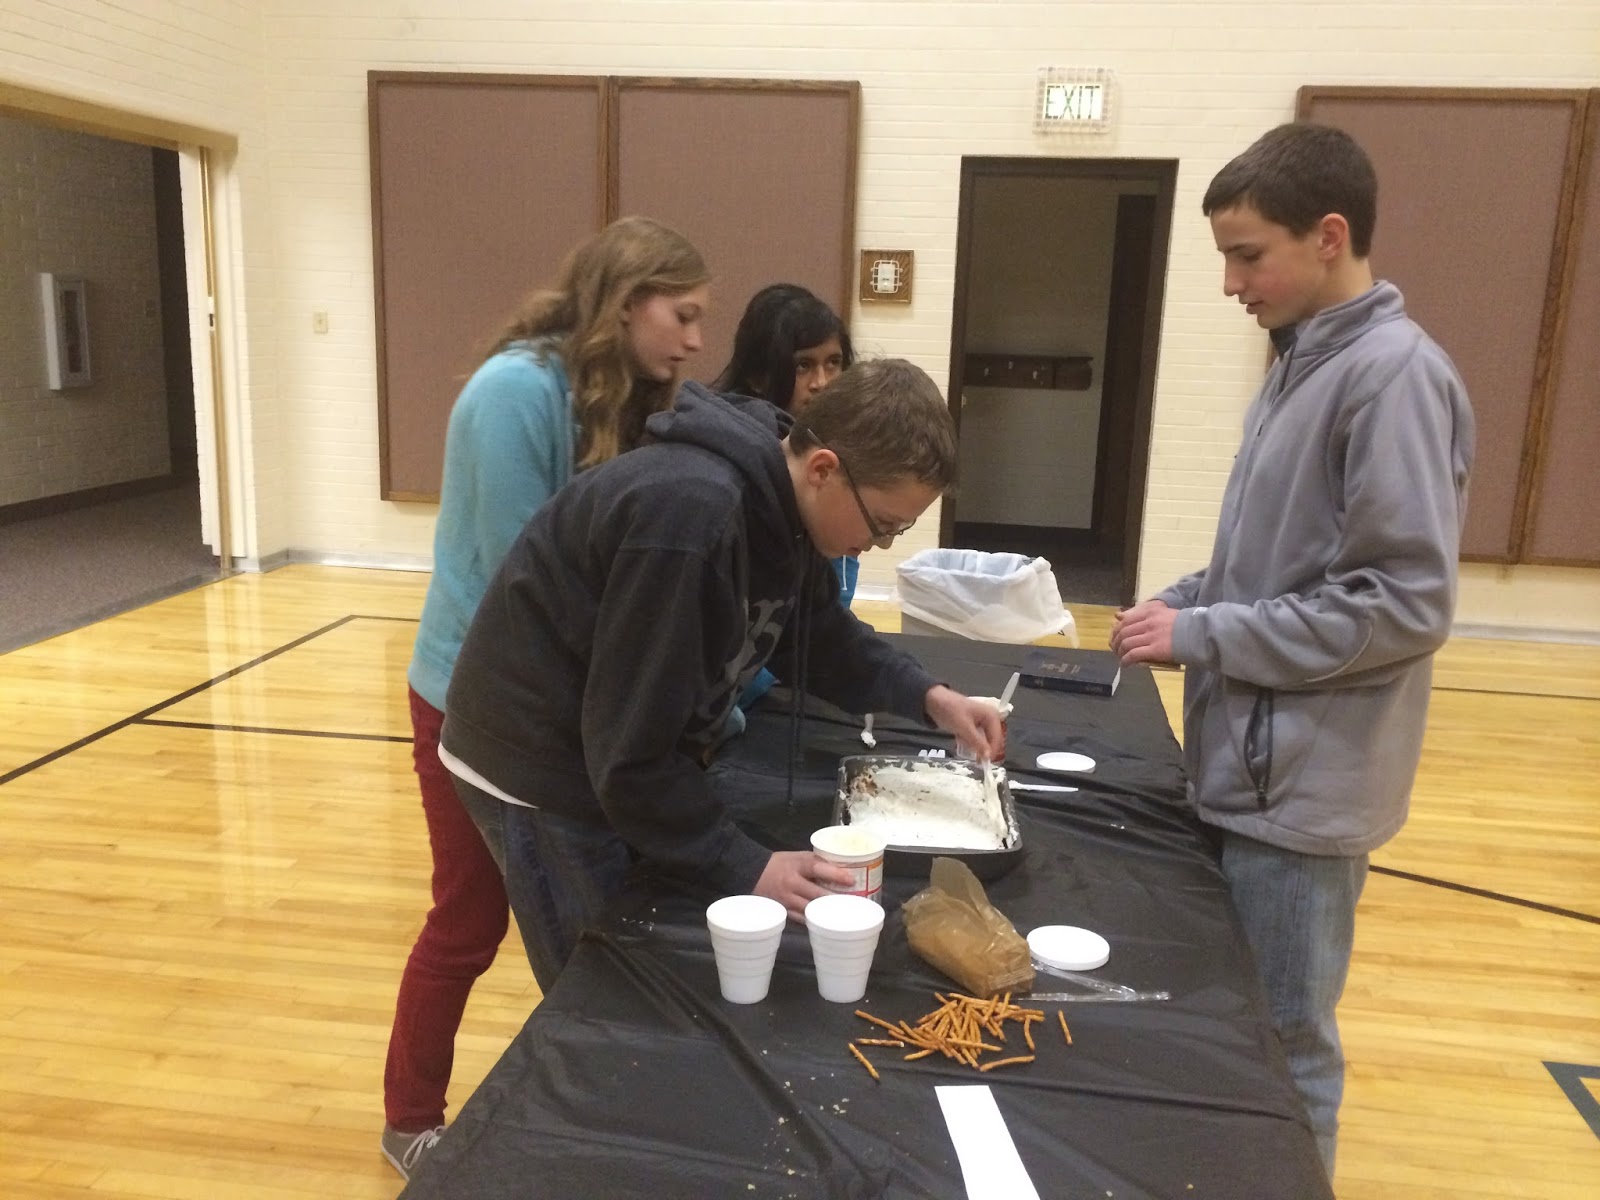
Next, I bought the decorating supplies. Things we used for cake decorating were: frosting (white), m&m's, pretzels, twizzlers (pull apart ones), marshmallows, graham crackers, tootsie rolls, knives and bowls. We also took food coloring so the youth could color the frosting any way they wanted. If you or any other leaders have cake decorating supplies, make sure to bring them. The night before our mutual activity I baked two cakes 13X9 each. If we had four groups the plan was to cut them each in half to have 4 cakes, but we only needed two.

Set up was super easy. All I needed was three tables. One for each group of youth and one for the decorating supplies. Both were covered in disposable table clothes = super easy clean up!

The youth were split into two groups. I let each group pick a piece of paper with the story and where it could be found in the scriptures. The stories the youth chose were: The Tree of Life and Samuel the Lamanite. They were each provided with a Book of Mormon so they could look up the story if needed, then they were let loose on the decorating!


After both groups were done decorating their cakes, we had each group of youth tell us the scripture story they had chosen and decorated their cake based on. I was so impressed by the youth's knowledge of the scripture stories! Then a leader shared their testimony of the importance of the Book of Mormon. At the end we cut up the cakes and had those as our treat for the night. It was a great activity and I will definitely be doing it again!


Wednesday, March 5, 2014

Why Special Education?

All the way up until my senior year of high school I was determined to be a veterinarian. I am one big sucker for animals. I've even cried in movies like Fox and the Hound, Air Bud, and Homeward Bound. Don't judge. It was my senior year in high school that I took an American Sign Language class... and I loved it! I wasn't too bad at it either. So when I went up to college at Utah State, my major was Deaf Education. I really enjoyed all of my classes and continued to take Sign Language.


All until the Spring of my Freshman year when I heard they were looking for volunteers to help coach in Aggie Special Olympics. How could I NOT volunteer?! It was through coaching in the Aggie Special Olympics that I found a true love for individuals with disabilities! The athletes are AMAZING! Soon after that I changed my major to Special Education. As I have written before, my emphasis is for children from birth-5 years old, however I have worked with individuals of all ages (6 months to 60's). I've coached special olympics, worked as a para-educator, worked in a summer program for individuals with disabilities, provided respite care, and worked as an ABA therapist until I graduated and am now a teacher in a special education preschool (3-5 year olds).


While we are on the topic, I feel it is appropriate to announce that today, March 5, 2014, is the annual day to focus on Spread the Word to End the Word! This is to promote eliminating use of the "r-word," retard(ed). It doesn't matter what way you use it, or that you don't mean to be offensive toward individuals with disabilities, it is still disrespectful to use the r-word. Go online and pledge to stop using the r-word and promote acceptance and inclusion of individuals with disabilities. To pledge, click on this link http://www.r-word.org/ and click on the orange button that says "Pledge and Be Heard" in the top, right hand corner. And don't forget to spread the word!

Individuals with disabilities are incredible! I am honored and feel it is a privilege to be able to serve them. Working with them always makes me happy, and even though my job leaves me exhausted emotionally and physically every day, I keep going back. These children, teenagers, and adults are truly special and have blessed my life more than I can express. I hope I can continue to be a resource to parents, siblings, teachers, and all those involved with individuals with disabilities.